Monday, December 22, 2008
Homemade Amaretto
I've been a busy little elf lately. Last night I finally got down to business and altered those little coke ornament bottles I've had in my stash.
First I removed the labels and the little ring that is left around the nexk of the bottle when the cap is removed. Then I went outside and spray painted all the lids a shiny gold. While they were drying I washed out all the bottles and then used a little bit of fingernail polish remover to take of the black manufacturing numbers on the side and neck of the bottle. When the bottles were clean and dry and I applied Chrismas rubons I had in my stash and then set about making the Amaretto.
I swear it tastes like the real thing...
In a saucepan over medium heat combine:
1 cup water
1 cup white sugar
1/2 cup brown sugar
Heat until just boiling and until all the sugar has dissolved. Remove from heat and allow to cool for 10 minutes. Next add:
2 cups Vodka
2 tablespoons almond extract
2 teaspoons vanilla extract
Stir well.
Fill your bottles with your homemade Amaretto. (One recipe above fills 2 bottles.) Add your gold lid and tie with a beautiful bow. Be sure to add a Homemade Amaretto tag!
I'll be giving these bottles to my friends and neighbors along with some Snickerdoodles and Nut Roll cookies.
If you aren't an Amaretto fan a quick search on the internet will turn up recipies for homemade Bailey's Irish Cream too!
Monday, December 8, 2008
Christmas Cards
The pressure is on. For quite a few years I have been sending homemade Christmas cards. I love making them, but now everyone expects one and I am not one to disappoint. This year I thought and thought and thought about the card I wanted to make. I've done cute. I've done country. I've done clever. Hmmmmmmmm. So this year's card is elegant. Yep, I know kind of out of the box for me. Hope you like it. I got the idea for the tree from Impress Rubber stamps. To make it I used a snowflake punch and 2 shades of blue green Bazzill Cardstock and red Bazzill Bling Cardstock.
The snowflakes are glued in just the center so the edges jut up and stick out-just as the branches of a tree would.
I cut the Happy Christmas words using my Cricut and their Christmas Soluntions cartridge. The silver stripe and tree trunk are from silver paper that I have had in my stash for so long I have no idea where they came from....the silver stars however are a completely different story. They are Hotfix metallic stars. If you aren't familiar with Hotfix- it's awesome. Metals, beads and crystals in all sizes and shapes you can imagine that when touched with the heated Hotfix wand aheres in seconds to whatever you want to place them on. Fun, product that I will Blog more about later this week.
Sunday, December 7, 2008
Folded Ornament
I tried making these folded ornaments the other day and they are really fun to do! They kind of remind me of when I was a teenager and we made gum wrapper chains. Here are the step by step instructions....
Step 1: Cut 8 equal squares of Scrapbook paper or Gift Wrap in any size you'd like. The larger the squares, the larger the ornament.
Step 2: With the wrong side up- locate the center of your square and fold all four corners into the center.
Step 3: Fold the bottom point of the square up to the top, making a triangle.
If you find your folding isn't tight enough to hold the pieces in place..Add a little drop of glue to the points and repeat the final step.
Step 4: Fold one flap down to the bottom edge.
Step 5: Fold the triangle in half away from you- making a smaller triangle. The "smooth" side goes on the inside.
Step 5: Slide the flaps of one triangle into the pockets of another. Repeat with all 8 squares until the ornament is completed. Add a hole and string to hang.
Saturday, December 6, 2008
Homemade Holidays Open House
If you're strolling around the internet today or tomorrow and are looking for something to do...I suggest dropping in at the Homemade Holidays Open House at Rocky Mountain Hobbies. You'll find it listed under the Cyber Crop Central section of the message board. The Design Team has put together fun Homemade Packaging ideas for their favorite homemade holiday goodies and have included the recipes. Fun,fun, fun!
For the crop I made little gingerbread houses from half pint milk cartons and included a recipe for microwave Peanut Butter Fudge as my project. Hope you'll stop by!
Tuesday, November 25, 2008
Christmas is Coming!
"This year I will be done with my shopping early. This year I will be organized. This year I will bake cookies for all my friends and neighbors. This year I will enjoy the holiday and won't let the stress get to me." This is my new mantra- I vow to say it to myself whenever I feel Christmas becoming a chore. Oh how I secretly long for those childhood days when it was all filled with excitement, fun and magic. That being said I truly am one who would much rather give a gift than receive one. I just wish I could fold my arms and nod my head ala I Dream of Jeannie and have everything cleaned and decorated, bought, wrapped and baked.
To get myself started in the Christmas spirit I made a gift bag and matching card.
To make these I tried something new. I used an ink pad that has no ink. It's glue!
I then used an acrylic stamp with the glue the same as if it were ink. The applied glitter to the glue. You can use a fine lose glitter or you can purchase glitter sheets. This also works with flocking. I then used Stickles glitter glue and added bulbs to my trees. It's hard to photograph- but it's really worth the effort. Very pretty. The result is much more professional looking than in the photograph. I can think of a thousand ideas for this technique. Adding names to ribbons. Making decorative edges on To and From tags. I highly recommend trying this technique so you too can get some of the sparkle, shine and magic back into your Christmas. Last year I did a country Christmas, this year I think I just might be putting on the Ritz! Not one to usually go for "bling" I think a little glitz might be fun for a change.
Monday, November 24, 2008
Funky!
I have advice today. It's my birthday. I'm getting older and feel like this qualifies me to give advice. Be bold. Be daring. Take risks! Maybe it's just a scrapbook page- but, I went out on a fun, funky limb for this one and I love it! I stitched, I inked, I stamped. I used patterns and colors I never thought I would use. I cut and layered and then I layered some more. I say go for it! There are no rules when it comes to scrapbooking!!! Just have fun.
Sunday, November 23, 2008
Oh MY GOSH she posted in her blog!!
I know- I know it's been way to long since I posted. Life went into warp speed for a while- but, things are back to normal (I hope). Anyway- I am getting caught up on my scrapping, it feels GREAT. Love this Granola line by Basic Grey. The combination of Blue and Brown seems to be my favorite lately. No the boys aren't in trouble- they spent a day volunteering to clean up a roadway to prevent all the litter and trash from winding up in rivers and creeks. This layout reminds me of something I learned recently. Whenever you are using a group of photographs it's important that one stands out and becomes the focal photograph of your layout, otherwise if all the photos are competing for attention your eye doesn't know where to look and everything becomes visually jumbled together. For this layout I chose Jake's face to be my photo focal point.
This layout left me a bit puzzled when it comes to color choices. What to do with the flourescent yellow that is in most of the photos? I decided to ignore it. What would you have done?
Monday, October 6, 2008
October
Is it just me or do you get excited when it's October 1st? To me it means the beginning of fall and all the holidays. I know that I am ready for fall clothes and fall foods and am secretly starting to think a tiny bit about Christmas. So fun.
I had a great time working on this layout. I love the pictures and I loved the paper..and the rubber stamps are so fun. Everything is by Cosmo Cricket in case you are wondering. I made the little bats, pumpkin and stars using the stamps. A little trick I used was using a hole punch to punch from my double sided patterned paper and used the little circles around the scallops. Perfectly coordinated and economical! For the journaling- I printed directly onto a photograph of pumpkin guts and then cut out and matted the strips.
The title wasn't standing out just plain black so I went around the edges and outlined using a white colored pencil- this looked to stark compared to everything else so I then went over the white with an orange pencil- I think it turned out pretty well. Thanks for looking!
Tuesday, September 30, 2008
Formation
Not a very complicated layout- but, I really wanted not to detract from the photo!
Always keep your eyes open for things that can be used as embellishment. The Boy Scouts of America strip at the bottom is actually from a Uniform shirt my son spilled paint on. I also saved the pockets, buttons and American Flag patch from the sleeve!
The arrows were plain chipboard that I covered with paper and then used a large nail file to sand around the edges. Taking time to do this simple step makes a world of difference!
When you have a ton of photographs surrounding a cetain theme (like I have for Scouts) look at all papers for patterns and colors that will work, don't just limit yourself to those designed for your exact theme. For example, the patterned papers used here are from the Basic Gray Mellow collection. Having papers like these will add a lot more interest to my son's finished album.
Monday, September 29, 2008
Hood Rats
Here's a tip for using leftover letters! To make the two different styles of lettering work for the title I made them work together by first adhering them to a piece of white cardstock and then cutting them out as a unit. I did this again with colored cardstock because I needed a little more punch- the result was a rather stylish title! I often wondered how people mixed and matched different letters so well.. I think this is the trick!
If you like the flowers they were fun and easy. I made them from pipe cleaners while waiting in the car to pick up my kids. I then punch a hole in the layout and stuck the "stems" through and split them like a brad... I think it turned out pretty cool!
Thursday, September 25, 2008
Lake GoJumpInA
This Monochromatic layout features a paper line called Mr. Campy. It's by Cosmo Cricket and I swear they had me in mind when they designed it. These papers and the sticker were perfect for this layout which is about the tradition of the Camp Staff swimming across the lake (in full uniform) following their final formation of the summer. I made the title by printing onto cardstock and then giving it a light watercolor wash-then once it dried cutting out each letter. I like this layout because I think I told the story both in pictures and in words.
Wednesday, September 24, 2008
Life Is Like A Box of Chocolates
Fun, Silly layout! I used watercolor paper and watercolors to make the sun and the word meeting.. definately a technique worth trying and using again and again. The colors in person are so vibrant and have so much depth. You can't see it very well in the scan- but, in true Forest Gump style I added a white feather- (it's right next to the word "Meeting") Don't you just love the little bird? He's from October Afternoon... one of my new favorite lines!
Friday, September 5, 2008
Easy Digital
I am definately not a digital scrapper. I love the feel of the paper and like the feeling of creating with my hands. I also know that I would never, ever in a million years print out the digital pages that I make. But, I do think it's great to use a little bit of digital wizardry here and there. Take this layout for example- I made the little logo. It took seconds, was done with clipart and it filled a void when I wasn't able to find what I was looking for in the way of embellishment shopping. It didn't require any special expensive programs - it was all done on Microsoft Word. It's another thrifty tip as the cost was a piece of scrap cardstock and the tiniest bit of computer ink!
Thursday, September 4, 2008
Organization
Are you in need of some motivation to get your scrapping supplies organized? I know that I sure am.....so I joined an Organizational Challenge on Rocky Mountain Hobbies.
The best thing about it is that it won't take a ton of time. Just a little a month. This month's challenge will be to organize your paper. She gave us a heads up so that we can gather all our paper into a box and be ready to begin when the challenge is actually issued. Next month we'll move onto something else. I love this idea- getting storage ideas from everyone and support and encouragement. If this sounds like something you'd be interested in doing.. why don't you join us? Go to the Rocky Mountain Hobbies Message Board, click on the Challenge section and then click on Orgazinational Challenge. Hope to see you there!
Tuesday, September 2, 2008
Sanding
Here's a cool tip that will really stretch your scrapping dollar! I made the pages below for a gift- so there are no photos- but, you can see the technique I used. I had chipboard letters in a great style-but, they were the wrong color. So I used double sided tape and stuck them to my table top, placed my patterned paper over them in the position I wanted the title and then lightly sanded with sandpaper until I got the desired effect.
Then out of a piece of cardstock I cut out the little fish and kept sanding and moving my paper along until I had him everywhere I wanted him to be. Pretty cool, huh? Better yet I still have my chipboard letters ready to use again and again. This technique works best on paper with a white core. In other words when you tear it- you see white along the torn edge as opposed to seeing the same color as the outside of the paper- however I have seen some cool techniques on solid color paper, sand and then go over top with chalk in a contrasting color for some pizzazz!
Wednesday, August 27, 2008
A New Direction
I had the perfect paper... I had the perfect photos... now what? I don't know why I did it or where I got the idea.. but, I cut the one photo into cubes and then adhered it mosaic style... pretty quick, easy and I thought it added a lot of impact, to an otherwise average layout. You should give it a try!
The letters I used for the word Journey were the same color as the background paper. I wanted them to look like the letters on the compass so I crumbled up a paper towel and held it in my hand so that it was all lumpy and bumpy...then I dabbed it into black Staz On ink and then onto the letter. I think they turned out well. Another quick and easy thing to try!
Monday, August 25, 2008
Scrappers Remorse
How cool are the rubbery "stickers" on this layout. The whole paper line is fun too!
It's all by a company called October Afternoon. So darn cute.
Usually I love the look of hand drawn titles... somehow this one seems to fall flat. I think maybe it's the color - brighter would have been better or maybe it's the placement of the letters... I would have liked the word "So" a little more to the left.
Does this ever happen to you? You scrap something and then wish you would have done this or that instead? It's maddening... I tell ya! It's like thinking of the perfect comeback to a remark someone made hours later. Hindsight is 20/20!
I'm so amazed by scrappers who can turn out page after page in a single evening and never seem to regret any of their decisions. It takes me hours to do a single layout and I am often already second guessing what I did.
Does it need more? Did I add to many things? Oh shoot I forgot about that patterned paper it would have been perfect. I think I need a support group.
Sunday, August 24, 2008
Three Cheers!
I have been wanting to Scrap for weeks. But, my sons have returned to school and getting into the routine of 5:30am wake-ups and carpooling has proven more difficult and time consuming than I figured.
So I made a family announcement. Eat what's in the fridge and don't bother me all weekend. I'm scrapping!
Here's the first layout from my weekend endeavors. It's from this summer at camp. 4th of July. If you happen to be looking for Scout Related products. The stickers I used are by a company called It Takes Two. Love when I find the perfect embellishment.
The tiny flag is actually a toothpick. Love using everyday things on a layout, don't you?
Three cheers for a weekend full of scrappin' !
Wednesday, July 23, 2008
Tuesday, July 22, 2008
Making Embellishments
Okay this was kinda fun. The liberty bell was made by putting metal "paper" over the top of a picture of the liberty bell and then tracking it with a ball point pen that was out of ink for the embossing. I printed the tiny Declaration of Independence onto manilla paper and then distressed it with Tim Holtz Distress Ink. I love when my embellishments are one of a kind.
Monday, July 21, 2008
Patriotic
Today I am working on my 4th of July pictures from this year. I thought I would have something to post-but it will have to wait. So today I am posting a calendar page I made a while back. It was for a calendar swap where everyone was assigned a month and everyone in the group a page for their calendar. It was lots of fun. The eagle is paper pieced and the flag is a toothpick. I used a gold paint pen around the edges of the actual calendar and then used distress ink. I think it has that important document historic feel.
Friday, July 18, 2008
What a Thrill...
I was so stumped when I first decided to scrap these photos. Patterned paper didn't seem right, but the layout needed some sort of texture. So I decided to try and make some letters that looked like the cascading water in the photographs. I started with a sheet of Hambly heavy clear overlays and applied modeling paste to one side with a palette knife. Then I went through the modeling paste over and over again with a toothpick and a straight pin until I got the look I wanted. It took maybe 30 minutes to dry and then I traced the letters and cut them out, making sure that the modeling paste was on the back. I glued them to the layout using Zip Dry paper glue. I got such a thrill with how they turned out.
Thursday, July 17, 2008
Scrap Trolley
You start a layout and when you're finished you have big scraps left over from the cardstock and patterned papers you used. How do you store all those wonderful scraps? My solution is what I call a scrap trolley. It's actually a rolling file folder holder. First I placed the hanging folders like I would have if I was using the trolley for it's intended use- then inside of each hanging file I placed an unused page protector with the open end usually used to slide your layout inside facing upward. Inside these page protectors is where I sort by scraps. I have seperate protectors for cardstock and patterned paper and then sort by color. Each protector holds 2 different distinctly contrasting colors.. for example I have black and white cardstock housed together. I've been using this system for years and it's one of the few storage systems that I have never changed. Best of all, the trolley fits right next to me rolled under my desk and when I need a small piece of this or that I just pull it out, find what I need and then roll it away out of sight.
Wednesday, July 16, 2008
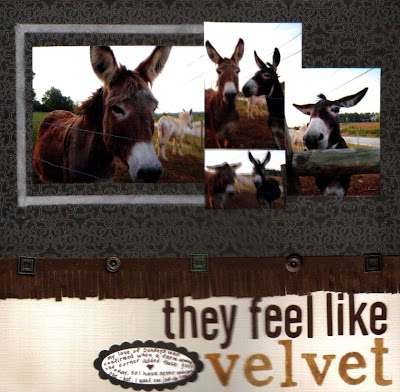
Flock of Donkeys?
If you haven't worked with Flocking yet- I recommend that you try it. I found it to be really fun to work with and really like the finished look and feel.
I bought the fun color variety pack from Doodlebug and can easily seeing myself adding a little flocking to this and a little flocking to that- just as a professional looking finishing touch to things. On this layout I used white flocking as a frame around the largest picture and brown flocking on the word velvet. In case you are wondering, I love watching a neighbor's donkeys they are the funniest things. I journaled about how keep asking for a baby donkey whenever a gift gifting holiday rolls around, but how nobody in my family takes me seriously. Really I just want a baby one- they can even bring it home in my minivan LOL.
Tuesday, July 15, 2008
Wonder
Wonder where I have been? I've been busy working on and off at Boy Scout Summer Camp. I LOVE that place. I would stay the whole summer if they would let me. This layout is of my oldest son looking at a cool moth in one of the shelters at camp. The title is simply printed out on regular computer paper and then I colored it in using an artist crayon. I also used the crayon to color in the arrows from the Rusty Pickle paper. Sort of half crayon-half pastel these crayons are awesome- because you get to rub and buff and smear until everything looks just the way you want it to- it's perfect in it's imperfection, because all those smudges and lines add an artistic flair to the layout as well as some much needed texture!
Monday, July 14, 2008
Remember Me?
Lately, I have come to realize that I try to do to many things. I'm Mom to 2 boys, hold a number of large positions when it comes to Boy Scouts, am the Design Team Coordinator for Rocky Mountain Hobbies and number of other things. I know I have said it before- but, something has to give... I decided after my hiatus that it isn't going to be this blog. I love blogging. So if any of you had the patience to wait for my return. Thank-you, thank-you, thank-you!
Here's a layout that I did over the weekend. One of the benefits to living in the country is farm auctions. We love them! Like a treasure hunt for big kids. So much fun. To make the chipboard letters work on the layout I first sanded them to remove the brightness of their patterns, then I applied some Distress Ink in the color Old Photograph. Finally I went around the edges with a black permanent marker in sort of a hit or miss fashion. With so many small pictures I didn't want the title to steal the layouts thunder. Hope everyone is well! More tomorrow.
Saturday, May 31, 2008
Credit Where Credit is Due
If you like the techniques used on the last three layouts that I've posted then this book if for you. It's packed full of awesome out of the box scrapping ideas and I can't wait to try ALL of them! While they might at first seem intimidating to a linear scrapper- don't let that keep you from using these ideas- a little bit of a new technique goes a long way when trying to give your pages a fresh new look.
There is nothing I love more that getting a brand new scrapping book. I spend hours upon hours pouring over the pages and ooohing and awwwing over the pictures of the examples. It's my number one weapon when I find myself in a scrapping slump. I find to get myself out of it all I have to do is pull a couple of my scrapping books off of the shelf and spend an evening page flipping to get me back in the scrapping groove.
Friday, May 30, 2008
Details, Details
At first glance this looks like a typical layout. But, on closer inspection you'll find there are a lot of details. Including the frame around the photo.
To achieve this look I allowed a one inch border of brown cardstock on either side of my photo. Along this border in sort of a random pattern I placed silver star brads. Once I checked to make sure I could easily slip my photograph into place, I removed the photo and began painting everything with brown acrylic paint. It took a couple of coats of paint, so be patient. Once everything dried I glued my photograph into place. This is a technique I know I will be using a lot more often.
While the cool 3-D effect is difficult to see in the photographs I highly recommend that you give it a try. You won't be disappointed.
Thursday, May 29, 2008
Before It's Gone
I live in an area that is changing. It's quickly growing with lots of homes, shopping and schools being built. I drive past this old Cotton Gin almost everyday and I found myself wondering how long it would be there, if anyone besides me cared.
So, I decided to start taking photographs of it and other things in my area that I love before they are gone. For the layout I wanted to something special, so I made the background "paper". Strips of masking tape were coated with Gesso which was then dried and painted. Once completely dried they were applied in a random order to my cardstock. The title is made from Tim Holtz's Grungeboard which I tried to make look rusted and weathered. I'm falling in love with this more artistic form of Scrapbooking.
Tuesday, May 27, 2008
Paper Piecing
If you'll remember in an earlier post I talked about my love for paper piecing and how I am definately going to do more of it on my layouts. Well I stuck to my guns and over the weekend made this layout with a paper pieced totem pole. Yep each piece and each color on the totem pole was cut from paper! I think it was worth the effort and it didn't take as long and you are thinking it did. Better yet, I didn't have a decent picture of the life sized totem pole I made for cub scout camp - without the paper piecing the only memory would have been a poor quality photo and it's a one of a kind, perfect embellishment for my page.
Monday, May 26, 2008
Keeping Busy
Whew the last few weeks have been busy! Both my boys are officially out of school for the summer. My oldest packed up and left yesterday for 8 weeks at his summer job. My youngest is recouperating from a fall from his bike that took off most of the skin from the palm of his right had and his right knee and I'm just trying to keep up with them all.
I'm working on lots of things. Especially organizing and house cleaning- my home has really gotten away from me over the last few months. It's making me CRAZY.
I have been working on some crafts... including Macrame Bracelets. I'll be spending 2 seperate weeks at Boy Scout Summer Camp this summer and I always like to come up with a craft I think the boys would like to do that will keep them busy during down time.
Okay so this example is kinda girly - but, you get the picture.
It's a lot easier than I thought it would be and the cost is minimal. I found the instructions online at Rings & Things a really great site full of fun jewlery ideas and instructions. For the camp I am thinking of doing the same bracelet -but, using 2 colors of hemp (Boy Scout colors) of course- not sure about beads yet.
Hope you'll stop back. I promise to be much better about posting!
Sunday, May 4, 2008
Masculine Pages
Just a couple of magazine ads for IKEA- but, I took some scrapping tips from them. Stripes=Strenght, Pattern=Power. Pretty interesting. I'd say this holds true when thinking about bold stripes and bold colors and shapes in patterns.
I love the stitching around the letters- they look like felt lettering. Using a simple font the words just jump off the page. All in all these ads have helped me- having 2 sons I do a lot of masculine pages. In a world of scrapping that has embraced, glitter, bling and an endless array of flowers, masculine pages can sometimes be tough. I equate it to clothes shopping. Women's clothing makes up 75% of the floor in any department store with the Men's section religated to just a corner. Blue, Green, Khaki, Blue, Green, Khaki, Brown, Black, Brown, Black.
Yawn.
Saturday, May 3, 2008
Collage
While a little to funky for me - I love the idea behind this. Creating artwork for my home using my Scrapping skills. If you look closely I see a lot of scrappy things going on here. Rubber stamping, Foam stamping, paints and inks. Scrapbook tiles, Dymo labeler. Are the large dots stickers or maybe die cuts? Is the scroll work on the "spinner" rub-ons?
I'll be redoing my youngest son's bedroom this summer and I can't wait for us to work together on some art for his walls, why not? Afterall I have all the supplies!
National Scrapbook Day
In celebration of National Scrapbook Day and to make up for all my time AWOL.. I've decided to make a bunch of Blog Entries today...I've been saving up some ideas and projects to share... hope you enjoy them.
Scrappy Chic
These photos taken from the May 2007 issue of Real Simple magazine are so inspirational to me. Look closely. The ladies are hand drawn and then lightly watercolored. It's their clothes that blow me away - simply cut from fabric or paper or ribbons they are glued directly onto the figures. I love how they are draped and folded into place.
To add to the realizm real beads, buttons and trims are added along with a little hand sewing to add seams.
As scrappers we can so do this! How often are we need in something more "grown up" than cutesy?
Don't be intimidated by the hand drawing - how about printing out a photograph and then adding homemade clothing on top of it?
Another option would be to search the internet for fashion drawings then print them out onto a transparency- then quickly turning the transparency over onto your cardstock and quickly rubbing it all over- lightly transfering the image (be sure to hold the transparency still) Fun!
Bargain Alert!
Friday, May 2, 2008
Update !
I'm baccckk! Sorry for being AWOL... between life and a computer virus I have been missing from the Online Scene and have had some serious withdrawls!
First, tomorrow is National Scrapbook Day and we're having an Inspiration Online Crop at Rocky Mountain Hobbies to celebrate. It's going to be great fun with a dozen Quickfire Challenges you can create in an hour or less and other terrific projects. 8am until Midnight(Eastern).
We've decided to definately keep the dog... thanks to everyone for your awesome name suggestions. We've decided to name him Bueller after Ferris Bueller. LOVE that movie and I can't resist the thought of standing on the porch calling him..and then saying... anyone? anyone? when he doesn't come.
I've got some cool bargains and such to post. But, I think I'll wait until tomorrow.
Saturday, April 12, 2008
Dog- gone it!
Sadly, our little hobby farm is a magnet for those who decide they don't want their pets anymore. Stray dogs and boxes of kittens can be found out in the yard up to a dozen times a year. Here's our latest visitor:
I opened the front door on my way to pick up my son at school and that's what was looking at me. Cute, huh.
Usually we try to find homes for these poor four legged friends. But, every once in a while one steals our hearts and ends up taking residence. I'm not sure if we'll keep this pup. He's going to be huge. But, how can I resist that face?
Either way he's going to need a name. Any suggestions?
Subscribe to:
Posts (Atom)